hello
Moderator: matt walker
47 posts
• Page 2 of 5 • 1, 2, 3, 4, 5
Re: hello
![]() by pa_friendly_guy » Sat Sep 06, 2014 1:09 pm
by pa_friendly_guy » Sat Sep 06, 2014 1:09 pm
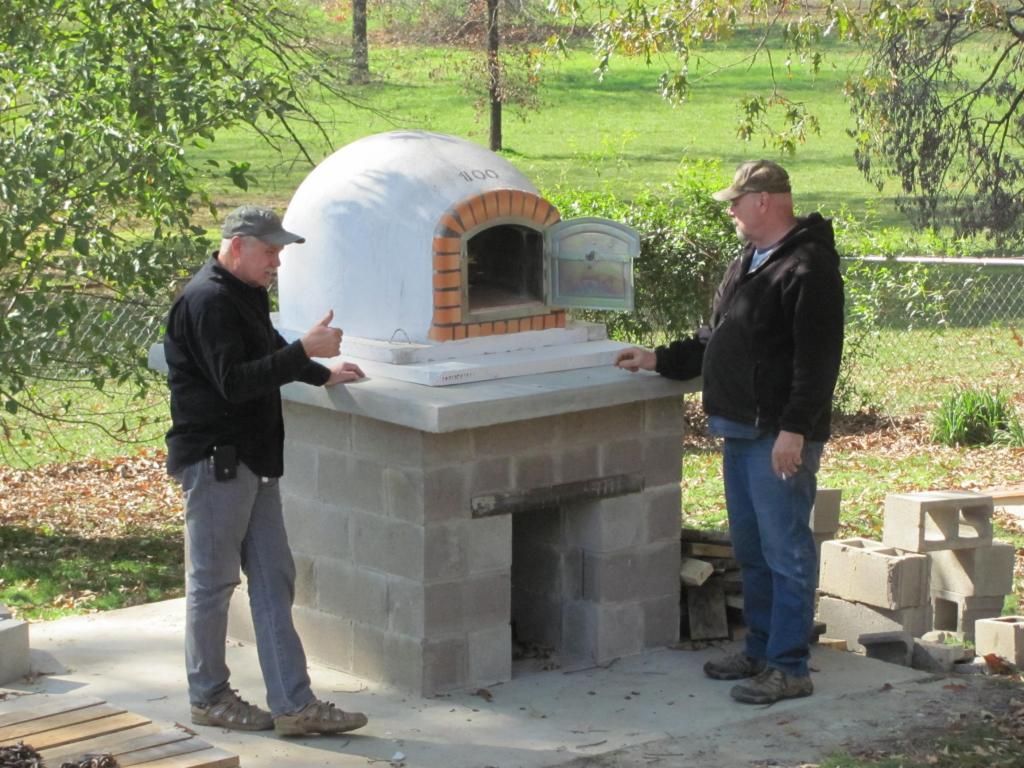
Great picture TS, looks like the oven is at a nice working height for cooking and checking the pizza. I assume that you designed and built the base yourself. Thanks for sharing. 
Never doubt that a small group of dedicated people can change the world, indeed it is the only thing that ever has.
-

pa_friendly_guy - Posts: 1502
- Joined: Sun Jan 08, 2012 9:24 pm
- Location: SW Pa They changed me to zone 6a what ever that is. I still figure zone 5
Re: hello
![]() by thickstrings » Sat Sep 06, 2014 2:27 pm
by thickstrings » Sat Sep 06, 2014 2:27 pm
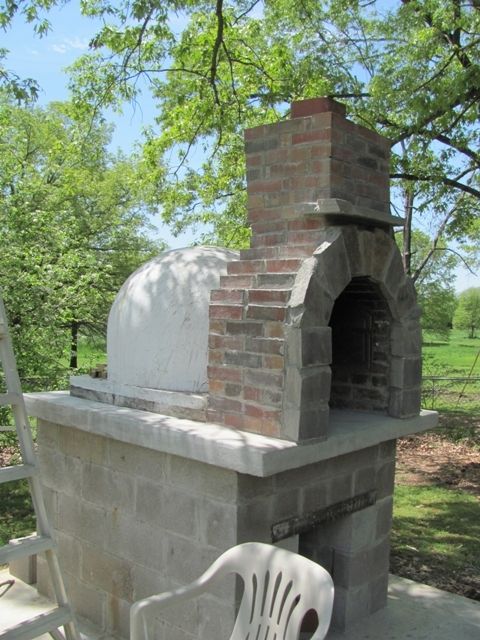
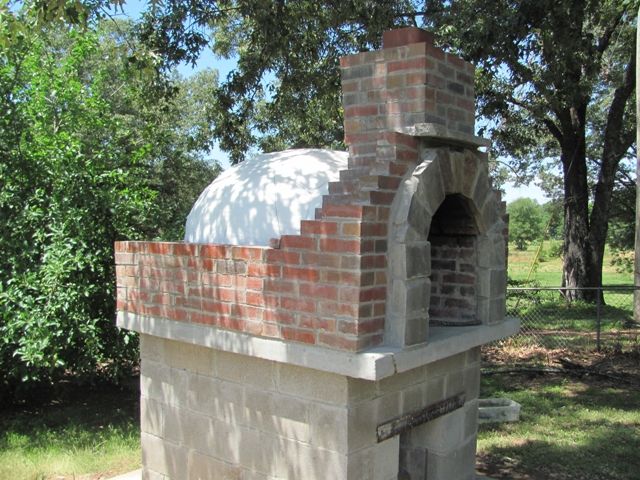
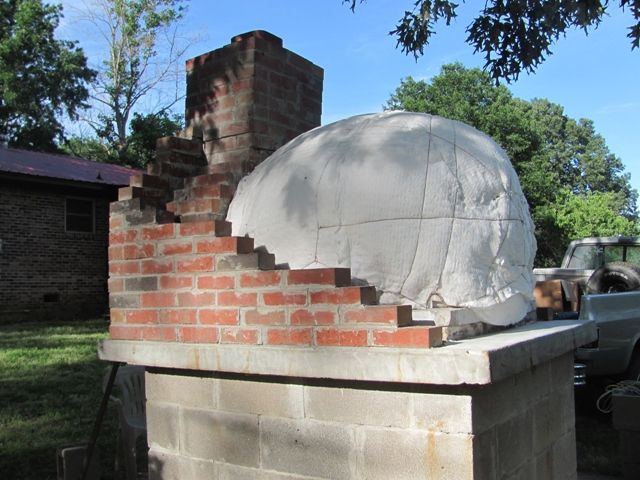
The oven itself is finished now, still have to finish the base. It has a concrete hip roof. The space between the dome and walls are filled with vermiculite , and the layers over the top are made of "vermacrete", Portland and vermiculite, in stronger and stronger layers. Stronger being more Portland and sand added. then, just hi -test concrete to form the hip .Lots of insulation! I'll have to take a pic of the way it is now, wife has the camera and is in Illinois. I plan to make a Bar/counter to facilitate making pizza.....and er, drinks...Might put the little 4" rocket in the counter for wok or frying.
" Life is art...Live a masterpiece"
- thickstrings
- Posts: 92
- Joined: Tue Sep 02, 2014 6:47 pm
- Location: Arkansas river valley
Re: hello
![]() by matt walker » Sat Sep 06, 2014 3:40 pm
by matt walker » Sat Sep 06, 2014 3:40 pm
Wow, that is a fantastic build TS. I'm interested in the roof. How did you create the form for a hip roof? I assume it was poured/cast in place.
-

matt walker - Site Admin
- Posts: 1806
- Joined: Tue Jan 03, 2012 5:50 pm
- Location: North Olympic Peninsula
Re: hello
![]() by thickstrings » Sat Sep 06, 2014 7:44 pm
by thickstrings » Sat Sep 06, 2014 7:44 pm
Well, I started to shape it with the "vermacrete" into the 3 planes that stop at the wall edge. Did the back hip first and lined the point up with the middle of the chimney ...Cut some 2x4's with a angle to kick out from the vertical wall, on the outside edge, as there is a 2" overhang and ran the 2 upper parts of the triangle to its outer edges. Poured the back first. After the back was hard, remove the upper parts of the triangle and continue around the edge of the other 2 side with the angle cut 2x4's fastening those with the outer edge of the back 2x4. I had to put some legs from the ground to the edge forms to hold them up, I had to tie rope around the whole thing to get the legs from falling over.....that was like a 3 stooges movie....Since the back angle was still green the new edges matched pretty good ,but, there are hairline cracks at the joints..no problem so far. Do one side to the middle and then the other all lined up on that point from the 1st plane. I screwed up with the front, cuz I stopped the roof at the front stair step ...guess I was to enamored with it to think clearly...ha ha. I will probably pour a round strip on the 2 front sides to go over the stair step of the front arch/wall.....and then add more of the blue stone to connect to the top shelf that is just above the arch so I can put a plaque or something on it. There it is , clear as mud.....When I get access to a camera again I will take a few more pic's. I'm the guy on the right in the first pic. Thanks Manny for the photobucket help.....
" Life is art...Live a masterpiece"
- thickstrings
- Posts: 92
- Joined: Tue Sep 02, 2014 6:47 pm
- Location: Arkansas river valley
Re: hello
![]() by matt walker » Sun Sep 07, 2014 1:00 am
by matt walker » Sun Sep 07, 2014 1:00 am
Nah, I got it. Thanks for taking the time to describe it. I think we might be long lost brothers or something, that sounds like how I'd go about it, ropes and odd legs and everything. I love that you just went for it like that. Way to get it done.
-
matt walker - Site Admin
- Posts: 1806
- Joined: Tue Jan 03, 2012 5:50 pm
- Location: North Olympic Peninsula
Re: hello
![]() by mannytheseacow » Sun Sep 07, 2014 10:43 pm
by mannytheseacow » Sun Sep 07, 2014 10:43 pm
That's looks like a hell of a project you took on there! It looks amazing. Where did you get the plans from on this?
I got a book like 10 or 15 years ago called "The Bread Bakers Apprentice" that has a full set of plans in it for pretty much the same thing you built. I've been wanting to do it ever since I got the book but still looking for the "best" spot to put it. I'm glad I've held off for so long now because I think knowing now what I didn't know then I would totally incorporate a rocket into it and build it from much simpler materials while maintaining the high insulation. Either way, yours is awesome!
I got a book like 10 or 15 years ago called "The Bread Bakers Apprentice" that has a full set of plans in it for pretty much the same thing you built. I've been wanting to do it ever since I got the book but still looking for the "best" spot to put it. I'm glad I've held off for so long now because I think knowing now what I didn't know then I would totally incorporate a rocket into it and build it from much simpler materials while maintaining the high insulation. Either way, yours is awesome!
"Knowledge is power. Arm yourself."
-

mannytheseacow - Posts: 942
- Joined: Sun Feb 24, 2013 12:40 am
47 posts
• Page 2 of 5 • 1, 2, 3, 4, 5
Who is online
Users browsing this forum: No registered users and 86 guests